Table of Contents
1. Introduction to French Tip Nails
French tip nails are timeless, classic, and always in style. Whether you’re preparing for a special occasion or just want to pamper yourself, learning how to create the perfect French tip nails can be both fun and rewarding. This guide will walk you through the entire process, from preparation to the final touch, ensuring your nails look salon-perfect every time.
French tip nails are known for their elegant and understated appearance. Traditionally, they feature a pale pink or nude base with white tips, creating a clean and polished look. The design is versatile, suiting any occasion and complementing any outfit.

2. Gather Your Supplies
Before diving into the process, ensure you have all the necessary supplies. Here’s a checklist to help you get started:
- Nail polish remover
- Cotton pads or balls
- Base coat
- White nail polish (for the tips)
- Clear top coat
- Nude or pale pink nail polish (for the base)
- Nail file
- Cuticle pusher
- Nail clippers
- French tip guide stickers (optional but helpful)
- Fine nail brush (optional for touch-ups)
┌───────────────────────────────────────────────┐
│ 🖌️ **Tip 1: Use Guide Stickers** │
│ For crisp, clean lines, apply French tip guide stickers before painting the white tips. Remove them before the polish dries. │
└───────────────────────────────────────────────┘

3. Prepare Your Nails
Proper nail preparation is crucial for achieving a long-lasting manicure. Follow these steps to ensure your nails are ready:
3.1 Remove Old Nail Polish
Use nail polish remover to get rid of any old polish. Make sure to clean your nails thoroughly to remove all traces of the previous polish.
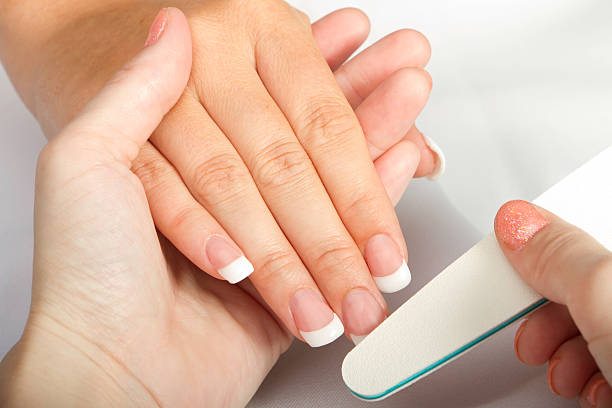
3.2 Shape Your Nails
Trim your nails to your desired length using nail clippers. File them into your preferred shape, whether it’s square, oval, or almond. A consistent nail shape makes the French tips look more polished.
3.3 Push Back Cuticles
Gently push back your cuticles using a cuticle pusher. This step helps to make your nail bed appear longer and gives a clean base for the polish.
┌───────────────────────────────────────────────┐
│ ⏲️ **Tip 2: Dry Between Layers** │
│ Allow each layer of polish to dry completely before applying the next one. This prevents smudging and ensures a smooth finish. │
└───────────────────────────────────────────────┘
4. Apply the Base Coat
A base coat is essential as it helps protect your nails from staining and provides a smooth surface for the polish. Apply a thin layer of base coat and let it dry completely before proceeding.
5. Apply the Base Color
The base color for French tip nails is usually a nude or pale pink. This shade provides a subtle contrast to the white tips. Here’s how to apply it:
5.1 Choose the Right Shade
Select a nude or pale pink polish that complements your skin tone. This will ensure the French tips stand out and look elegant.
5.2 Apply the Base Color
Apply the base color evenly across the entire nail. Start with a thin layer to avoid clumping. Allow the base color to dry completely before moving on to the next step.
┌───────────────────────────────────────────────┐
│ 💧 **Tip 3: Apply a Top Coat** │
│ Seal your French tips with a clear top coat for added shine and durability. It also helps prevent chipping and extends the life of your manicure. │
└───────────────────────────────────────────────┘

6. Create the French Tips
Creating the perfect French tip can be challenging, but with a little practice, you’ll get the hang of it. You can use French tip guide stickers for a precise application or freehand the tips.
6.1 Using French Tip Guide Stickers
French tip guide stickers are great for achieving straight, clean lines. Here’s how to use them:
- Place the Sticker: Stick the French tip guide stickers onto your nails, positioning them where you want the white tip to start.
- Apply White Polish: Paint the tips of your nails with white polish. Ensure an even application, covering the area above the sticker.
- Remove the Stickers: Carefully peel off the stickers before the polish dries completely. This will prevent smudging and ensure a clean edge.
6.2 Freehand Application
If you prefer a more hands-on approach, follow these steps:
- Apply White Polish: Using a fine nail brush or the polish brush, carefully paint the tips of your nails. Start with a thin line and build up to your desired thickness.
- Shape the Tips: Use the brush to create a straight, even line. If necessary, use a nail polish remover and a brush to clean up any mistakes.
7. Finishing Touches
Once the white tips are dry, it’s time to add the finishing touches to your French manicure.
7.1 Apply a Top Coat
A clear top coat seals your manicure, giving it a glossy finish and protecting it from chipping. Apply a thin layer of top coat over the entire nail and let it dry completely.
7.2 Clean Up
Use a small brush dipped in nail polish remover to clean up any polish that might have gotten on your skin or cuticles. This step ensures your nails look neat and professional.
8. Tips for a Perfect French Manicure
To achieve the best results, keep these tips in mind:
- Use Thin Layers: Apply nail polish in thin layers to avoid clumping and ensure even coverage.
- Allow Dry Time: Let each layer of polish dry completely before applying the next one to avoid smudging.
- Maintain Clean Lines: If using guide stickers, ensure they are firmly in place to avoid leaks and uneven lines.
9. Troubleshooting Common Issues
Even with the best intentions, things don’t always go as planned. Here are some common issues and how to fix them:
9.1 Uneven Tips
If your tips are uneven, use a fine brush and nail polish remover to correct the edges. You can also apply a thin layer of white polish to even them out.
9.2 Smudges
If you accidentally smudge your French tips, wait for the polish to dry and then carefully touch up the area. A thin brush dipped in remover can help clean up the smudged areas.
10. Maintaining Your French Manicure
To keep your French tips looking fresh, follow these maintenance tips:
- Avoid Harsh Chemicals: Wear gloves when cleaning or handling harsh chemicals to prevent chipping.
- Moisturize: Keep your hands and nails moisturized to prevent dryness and breakage.
- Touch Up as Needed: If you notice chips or wear, touch up the polish as needed to maintain a clean look.
11. Alternatives to Classic French Tips
If you’re looking to switch things up, consider these alternative French tip designs:
- Colored Tips: Experiment with colors other than white for a fun twist.
- Glitter Tips: Add a touch of sparkle with glitter polish on the tips.
- French Ombre: Create a gradient effect by blending the tip color into the base.
12. Conclusion
Mastering the art of French tip nails can elevate your manicure game and add a touch of sophistication to your look. By following these steps and tips, you can achieve salon-quality results right at home. Remember, practice makes perfect, so don’t be discouraged if your first attempt isn’t flawless. With a bit of patience and perseverance, you’ll be able to create beautiful French tips that last.
FAQs
1. How long does a French manicure last?
A French manicure can last up to two weeks, depending on how well you maintain it and how much wear and tear your nails endure.
2. Can I use gel polish for French tips?
Yes, you can use gel polish for a French manicure. The process is similar, but you’ll need to cure the gel polish under a UV or LED lamp for each layer.
3. How do I fix a chipped French tip?
To fix a chipped French tip, touch up the chipped area with the white polish and a fine brush. Apply a new layer of top coat to blend it seamlessly.
4. Are French tips suitable for short nails?
Yes, French tips can look great on short nails. You can adjust the width of the tips to suit the length of your nails.
5. Can I do a French manicure at home without professional tools?
Absolutely! While professional tools can be helpful, you can achieve a beautiful French manicure with basic supplies like nail polish, a brush, and guide stickers.